I constructed a bracket from 1/16″ aluminum stock to hold the rotary switch and key assembly. It would make a machinist cry, but not too bad for basic hand tools and a bench vise.
.
This was a fun installation…
.
Clear prop!
I got some more work done on my cockpit panel. The paint is not good at all, it is flaking off very easily. I am considering this panel a rough draft and will likely replace it someday. The 1/8″ hardboard is OK but metal would be much nicer.
.
Here is the frame I built to hold the panel and eventually electronics.
.
There is no wiring yet but I test fitted some switches. I really need some instruments to fill all those holes!
I have started work on a magneto/starter switch for my cockpit simulator. This will be a 5-position switch with Off-L-R-Both-Start positions. The start position will spring return to the both position.
.
This is a 4-pole, 3-position switch that I modified to be a 1-pole, 5-position switch. I chose it because it would have a 30° spacing between positions and it was readily available at my local electronics shop. The modifications included a bit of tweaking to the physical limit ring to allow 5 positions and removing 3 of the 4 wipers to get just one pole. The picture on the right shows the end of the shaft modified to a “D” shape. You’ll see why in a bit.
.


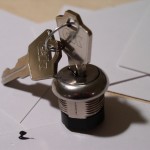
Here is a C&K 3-position key switch. I have removed the switch part and modified the key insert for full 360° rotation. It is a little hard to see, but the key insert has a “D” shaped hole that mated to the removed switch. This of course will match nicely with my rotary switch shaft.
.
With the help of some shim stock (the little squares next to the motherboard standoff for reference) the rotary switch hooks up to my key switch. The next step is to build a bracket and some sort of spring action to return from the start position.